Key Skills Practiced in This Project
- Use of a SIEM, specifically Security Onion.
- Receiving, assigning, and properly documenting a case for an alert in a SOC environment.
- Analyzing SIEM alerts and event logs.
- Analyzing packet captures of events with Wireshark.
- Identifying malicious IP addresses through use of OSINT tools.
- Using a Hex Editor to identify File Headers and find executable files disguised as other file types by an attacker.
- Analyzing Snort-based rules to understand what triggers an alert.
- Identifying potential exfiltration of data based on alert information.
- Communicating to a MSSP (Managed Security Service Provider) client about a case escalation, explaining the likely causes of events, and making recommendations for remediation and prevention of future attacks.
Project Overview
In this lab, which was done by following “Cybersecurity: SOC Analyst Mini-Course (Training)” by MyDFIR, I practiced with an open source SIEM called Security Onion. Security Onion refers to their tool as being a platform for intrusion detection, network security monitoring, and log management. In addition to using Security Onion, this lab also involves using Wireshark for analyzing pack captures, use of online resources to perform OSINT (open-source intelligence) on a suspected attacker’s IP address, and using GNOME Hex Editor, Ghex, to look at file headers.
This mini course and training project also covered the basics of what a SOC Analyst does on a daily basis, such as monitor, triage, escalate, and make recommendations. MyDFIR also goes over concepts which I had already gotten familiar with during my studies for the CompTIA Security+ certification. It’s good to get repeated exposure to important frameworks like the NIST Incident Response Lifecycle, SANS Incident Response Lifecycle, Lockheed Martin Cyber Kill Chain, Pyramid of Pain ,and the Mitre Att&ck Framework. There is also a brief overview of how to use the free resources provided by Mitre to learn about different exploits and corresponding preventative measures.
I deviated from the training project slightly in order to learn more about the concepts I was introduced to, and also to incorporate skills and tools I had gotten experience with from other projects.
Security Onion Install
Security Onion is FOSS (Free and Open Source Software), so I just had to download an ISO from their GitHub https://github.com/Security-Onion-Solutions/securityonion
One way I differed slightly from the creator of this training project, myDFIR, is that I used VMware Workstation 17 Pro instead of VirtualBox. I already have plenty of experience with VirtualBox, and recently got VMware for another project. I want to get very comfortable with VMware by using it for all my projects that require a hypervisor because I am more likely to encounter VMware products in my career than VirtualBox. Either way it’s not an extreme difference.
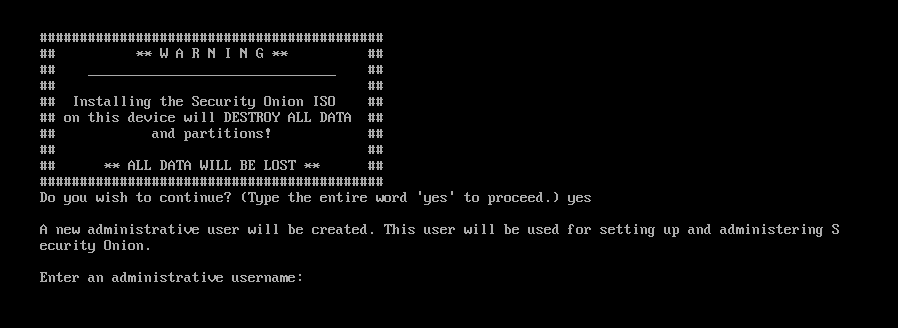
Simulating Receiving an Alert as a SOC Analyst
One skill I developed from this project was analyzing logs of malicious traffic and learning about what I would do once seeing these logs in a SOC environment. The malicious traffic was replicated by using Malware-Traffic-Analysis.net, and importing a PCAP (packet capture file) into my Security Onion instance.


One reason for simulating malicious traffic, and seeing the logs that the traffic caused, was to get introduced to the SOC Analyst workflow. The creator of this training project, MyDFIR, has many years of experience working in SOC’s, and explained what the workflow would be once malicious traffic was found. I followed that workflow while also further researching the concepts behind each part of it.
Starting the Case as a SOC Analayst
The first part of emulating a SOC workflow process was receiving an alert, and assigning the alert to an analyst. This starts by acknowledging the alert once I have seen it, then assigning it to an analyst, which in this case is myself. In Security Onion, this is done by clicking on an icon on the alert and selecting “Escalate to New Case”, then going to “Cases” and selecting the new case. To actually assign it, there is an “Assignee” drop-down menu to select a user’s email address from. I then marked it as “In Progress” for it’s status.
I learned the importance of actually assigning the case to yourself before you start working on it. It’s important because not assigning it to yourself may mean that another analyst is wasting time looking at a case which you are also working on.
Just as it is important to have clear communication in personal interactions, it is also important to have clear communication through properly documenting your work for others to clearly understand what you are working on and what you have done with a case.
Investigating the Alert
The alert I was working with had a signature associated with it that I could use to understand what kind of attack was happening. Security Onion provides a “Hunt” utility which allows me to query for data and find logs reporting the same signature. This allows me to see when this attack, or at least an attack with this signature, was first logged.
All of the logs with the same signature were coming from the same source IP and going to the same destination IP. I searched the destination IP with a few online OSINT tools to see what information was available regarding this IP address.
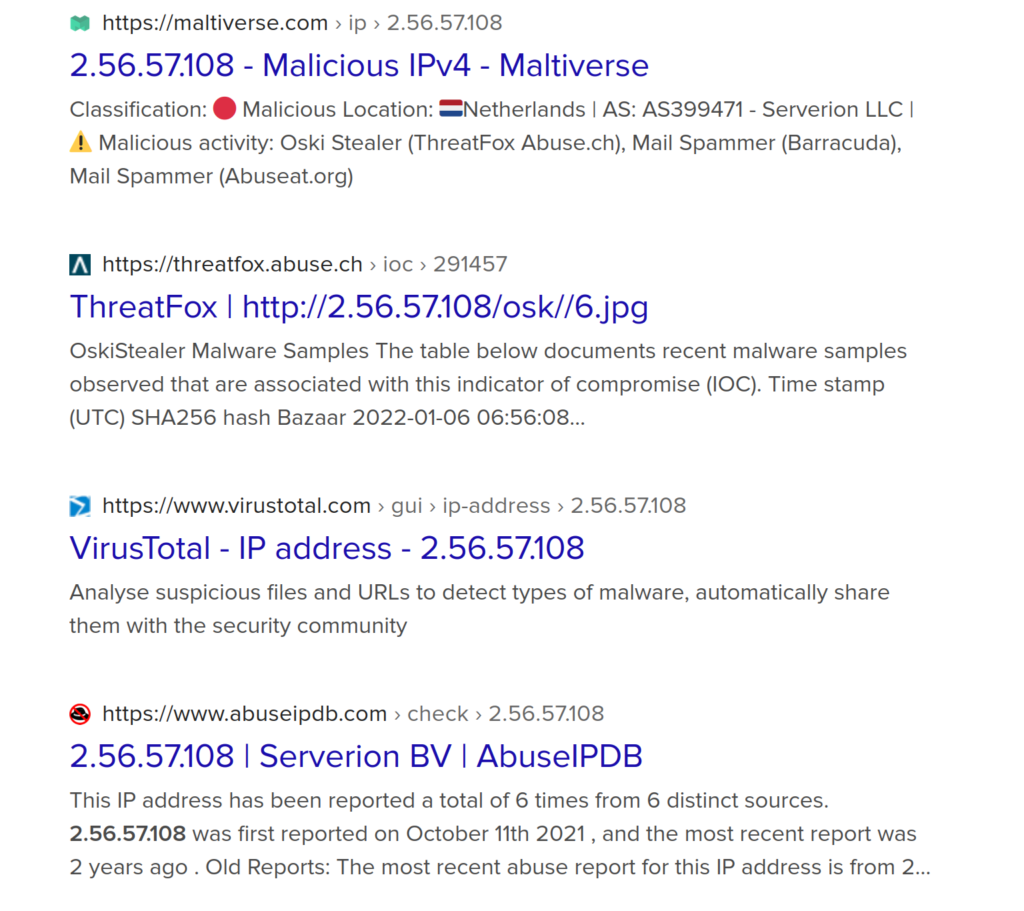
This packet capture is from an attack in 2022, so that is why in early 2024, when I’m doing this, it says these results are 2 years old.
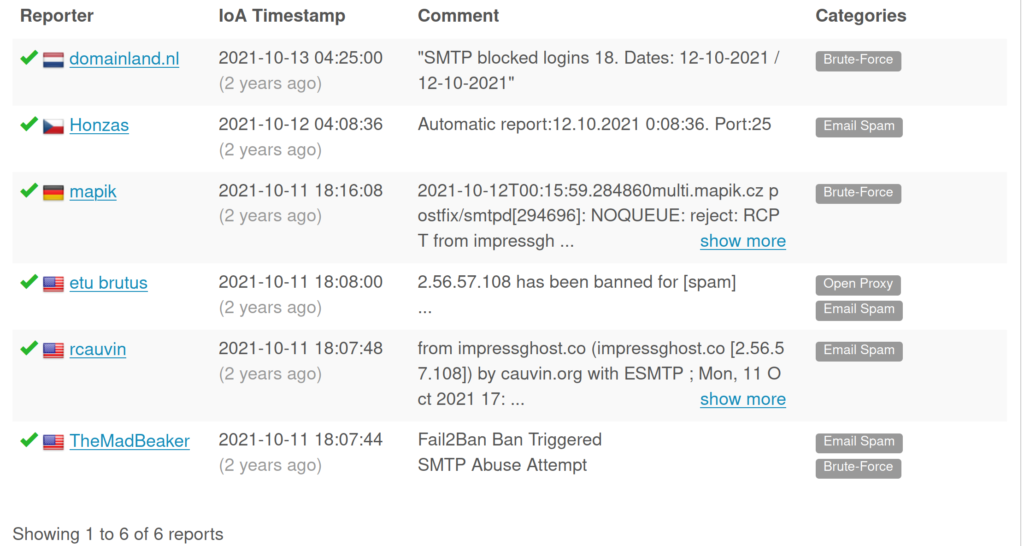
Multiple IP address reputation lookup tools online all said that this IP address was known to be malicious. Abuseipbd.com had 6 reports about this domain, and each of them contained something relating to SMTP (port 25), or spamming related reports. In addition to these IP lookups, the IP address was also marked as malicious by VirusTotal. Now I know the attacker’s IP and the infected computer’s IP on our network.
Investigating Other Related Logs
After investigating the IP address, I learned about the use of the network.community_id column for logs in Security Onion. The use of the network community ID is to search the SIEM for all events relating to the event you are interested in. This allows me to see all the other logs which are part of this same attack.
My next detour was learning the basics of using a hex editor to look at the file header of a file to see what type of file it really is. This allows you to be certain that the file extension in the file name is accurate. The reason this was part of this project is because some of the logs had a file header in it to indicate what type of file was being downloaded during the event. In this case The file header was MZ, which means the file could be a DLL or EXE, among others. Seeing as EXE and DLL files are extremely common in attacks, it’s important for me to memorize what this file header means, as well as know how to find a file header for a file that I am uncertain about. Even in this example, Security Onion will show the MZ header, but will incorrectly classify it as “Content Type :image/.jpeg”
Understanding Snort-Based Rules
After learning the basics about file headers, and hex editors, I learned more about how the rules were crafted for this particular event alert. This rule is called “ET MALWARE Vidar/Arkie/Megumin/Oski Stealer HTTP POST Pattern”. Looking under “rule.rule”, it’s details are shown. After researching what the rule structure is, I found out that these are Snort-based rules. “flow:established.to_server;” means it it looking to see if a server is being connected to, “http.method; content:”POST”;” means the HTTP connection type needs to be POST. POST is a request method supported by HTTP. Then the most interesting part of the rule is “ http.header; content:“:boundary=18EF0A57BE110FD467A” ”. This being found in the HTTP header is what triggered the alert. This is the primary component in this rule which tells the SIEM that this is malware.
Identifying Data Exfiltration by Attacker
While looking at the rest of the logs associated with this attack, there was one alert for a rule named “ET HUNTING Suspicious Zipped Filename in Outbound POST Request (Chrome_Default.txt)” in the rule category “Potentially Bad Traffic” with an event severity of medium. This is interesting because a zip filename in an outbound POST request means that data is most likely being exfiltrated. Looking at that and seeing that it is the same destination IP which we know to be malicious, and it’s looking like the attacker is exfiltrating our data.
After looking at all the logs from this PCAP file, I opened the same PCAP in Wireshark (protocol analyzer). I have used Wireshark before while experimenting with basic WiFi network traffic scanning while trying to learn about WPA2 attacks, but this was my first time looking at a packet capture in it. One of the most useful skills to have when using Wireshark, is knowing how to search for the data you want to focus on in an efficient manner. The way I filtered my results to only look at data relevant to the attack, was by searching only for HTTP POST requests. To do this I typed “http.request.method == POST” into Wireshark’s search bar. Out of all the POST requests, there was only one with (zip) in the info column. It was also to the same destination IP as the Security Onion alerts.
Now that I have found the POST request I was looking for, I went to follow TCP stream. This showed the .zip filename, the time, and that the information they were after was probably browser-stored credentials from Google Chrome and Microsoft Edge autofill and cookies. Also in the TCP stream was passwords.txt, a screenshot, and outlook.txt. In this project, I’m not going to get deep into digital forensics, but looking at the TCP stream is valuable to understand what the context of the traffic is.
The PCAP used in this project only has one infected client associated with the attack, but to see if there are any other systems on the client’s network which have communicated with the malicious IP address, I searched the logs for all events involving the attacker’s IP address by simply typing in the IP address in the search bar. Then I was able to confirm the scope of the potentially infected machines was limited to only one infected system from the attack.
Finding Specific Information About the Victim
Viewing this attack from the perspective of a MSSP (Managed Security Service Provider), I will likely have to explain what has happened to a client business in my reporting of the situation. I currently have the source IP address, which in this case is the infected system on the customer’s network, but I need to see if I can provide more specific information like the host name of the system and the username. To do this, I searched “Kerberos” in the search bar, because this client uses Kerberos and that is usually where information like the host name and username are stored. The logs for the client system had a column for “kerberos.client” which had the host name listed there. One of the logs contained the username inside.
Documenting Findings and Escalating the Case
For finishing up the case, I want back to the “Cases” list and went into the case to document my findings. For the attachments section, I attached the files from the packet capture which showed what files had been exfiltrated in a ZIP file from an HTTP POST Request. In the “Observables” section, I added the hash of the malware. This would allow another analyst, or myself to reference this case if the same malware is found in the future.
With all of this information, the case is now ready to be escalated to the client. The escalation says the following:
Email to Client
This email to the client and list of recommendations are directly from the mini-course, but I will put them in this post to show what I learned about writing to the client and making recommendations for a client. I don’t want to be mistaken for implying that I constructed these originally by myself.
“On January 7th, 2022, at 16:07:32 UTC the asset 192.168.1.216 (DESKTOP-GXMYNO2) belonging to steve.smith was seen reaching outbound to a suspicious IP: 2.56.57.108 which is a known malicious IP.
Upon further investigation it is highly likely that the asset is infected with the malware Arkei/Oski stealer, which is known to steal passwords.
Exfiltration was observed which appeared to contain passwords and web browser data. The last observed occurrence was on January 7th,2022, at 16:07:35 UTC.
We have searched across the environment and have confirmed that this was the only asset that had reached out to this malicious IP.”
Recommendations For The Client
“Recommendations
Immediately contain this infected asset to prevent further unauthorized activities
Force a password reset for the user steve.smith because password exfiltration had occurred, and ensure multi-factor authentication is enforced
Consider performing a forensic analysis to determine exactly what had been accessed and if any other additional data were exfiltrated. If deemed unnecessary, re-image the asset.
Although IP’s are cycled often, due to this IP being reported as malicious, consider placing it in a rolling block list.”
Closing the Case
After the escalation to the client is complete, I would add a comment in the case comments “escalated to the client”. I would also add an attachment of the ticket, or a copy of the email I sent to the client.
I learned quite a bit of practical skills and concepts to use in a SOC Analyst role during this project. The hands-on experience with tools used in a SOC made me feel much more prepared to continue on into searching for an opportunity to work in a SOC. In addition to these technical skills, I also learned the importance of creating a timeline of events during an investigation, and the importance of not getting overly fixated on a single event log. I already had a grasp of the concepts before this project, but studying for certifications can only teach a person a certain amount. The application of the concepts in response to real world events feels much more rewarding than memorizing definitions and frameworks.

0 Comments