Skills Developed in this Project
- Navigating through the Microsoft Azure Portal.
- Creating and managing Resource Groups.
- Creating an Azure Storage Account.
- Tracking and managing costs of using cloud resources.
- Creating and managing virtual machines and virtual networks in Azure.
- Remotely accessing Azure virtual machines with RDP.
- Blocking traffic using Network Security Groups.
Why You Should Learn How to Use Azure
Microsoft Azure is the second largest cloud infrastructure provider by dollar amount with 25% of the market share as of the first quarter of 2024. that is only 6% behind AWS, and a whole 15% more than the 3rd largest cloud provider, Google Cloud (https://www.statista.com/statistics/967365/worldwide-cloud-infrastructure-services-market-share-vendor/).
Learning how to use Azure will be useful for many IT roles. An increasing number of organizations are adopting hybrid or fully cloud based infrastructure. Learning how to use Azure will help you develop a better understanding of how to navigate and use cloud infrastructure services. These skills will help prepare you for a variety of IT roles.
Creating a Tenant in Azure for Free
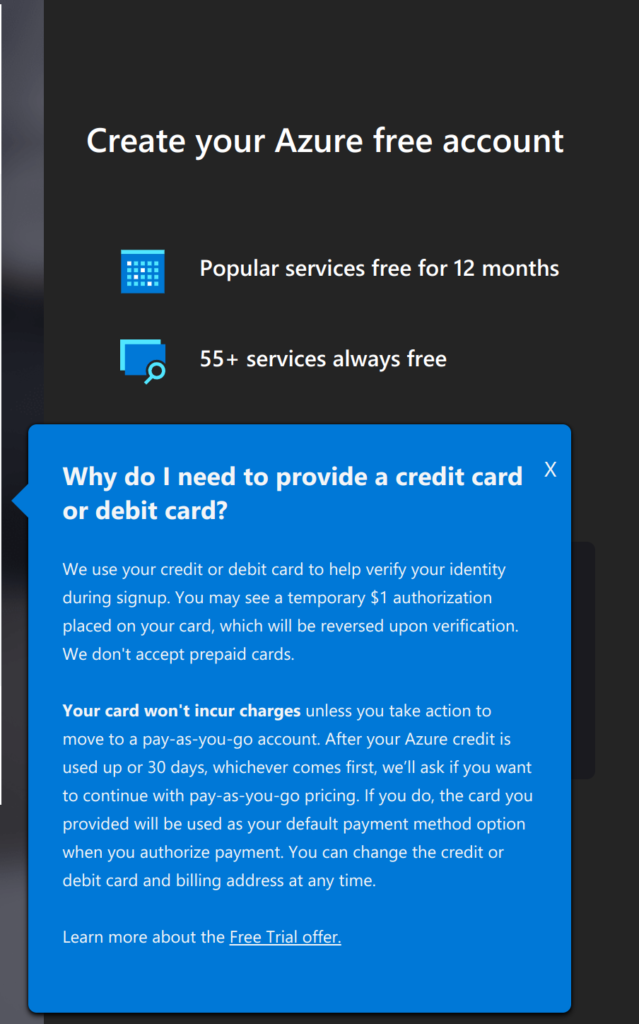
Microsoft allows new users of Azure to make an account which comes with a free $200 credit. The main downside is that this free account does require the use of a credit card to create.
https://azure.microsoft.com/en-us/free/#all-free-services
As with any Microsoft service, they will require you to sign in with a Microsoft account. They will also ask for your phone number. You also have to enter your address and card information, but they clearly state that you will not be charged anything. There will be no recurring payment after the trial $200 is over with. After that, you will be able to go to the main page of the Azure Portal.
By the way, if you are wondering why the email name seen in the screenshots is pond_krypton, it’s because it’s a randomly generated email address made with Simple Login. I’ve mentioned it in previous project posts because it’s a very useful tool for preventing Microsoft spam emails from being sent to an email address you actually care about.
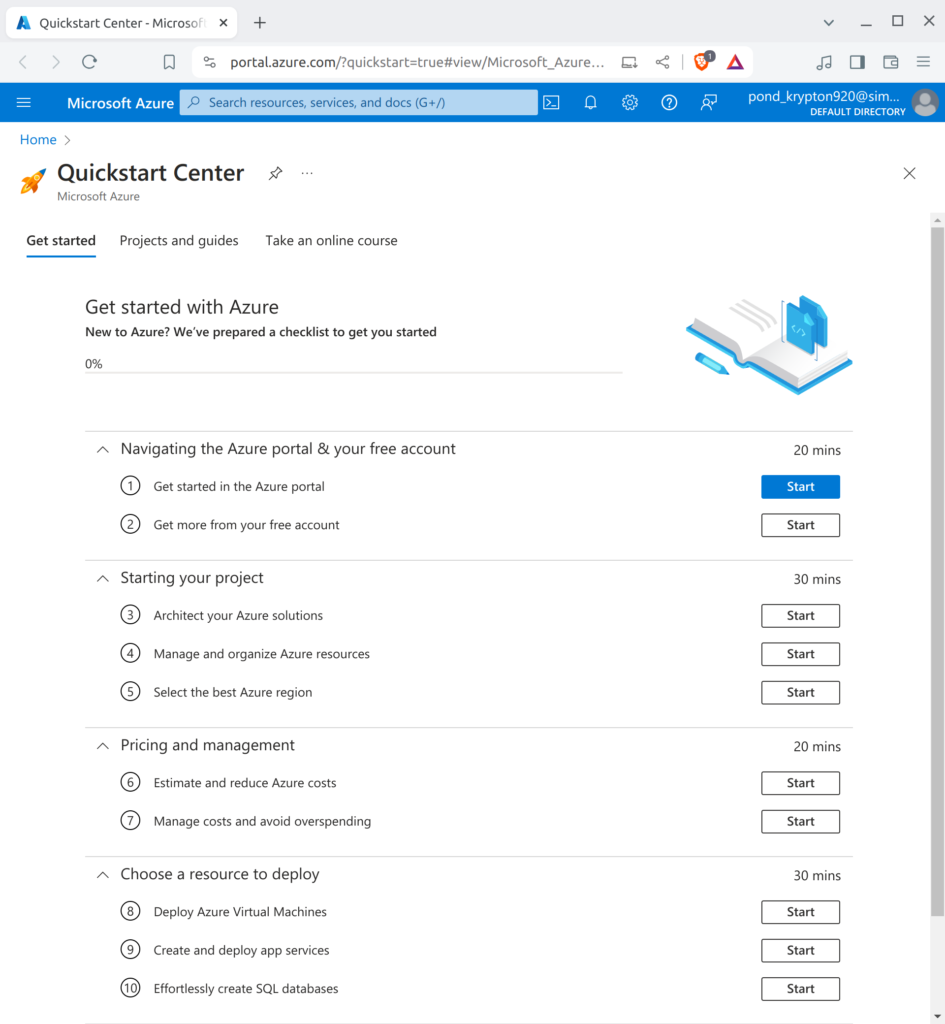
We have now created an Tenant, which is a term used to describe the organization who is using Azure Cloud Services. Think of it as a tenant who rents a house, with the house being space on a server. A tenant is not the same thing as a subscription. A tenant can have multiple subscriptions underneath it.
Creating a Resource Group
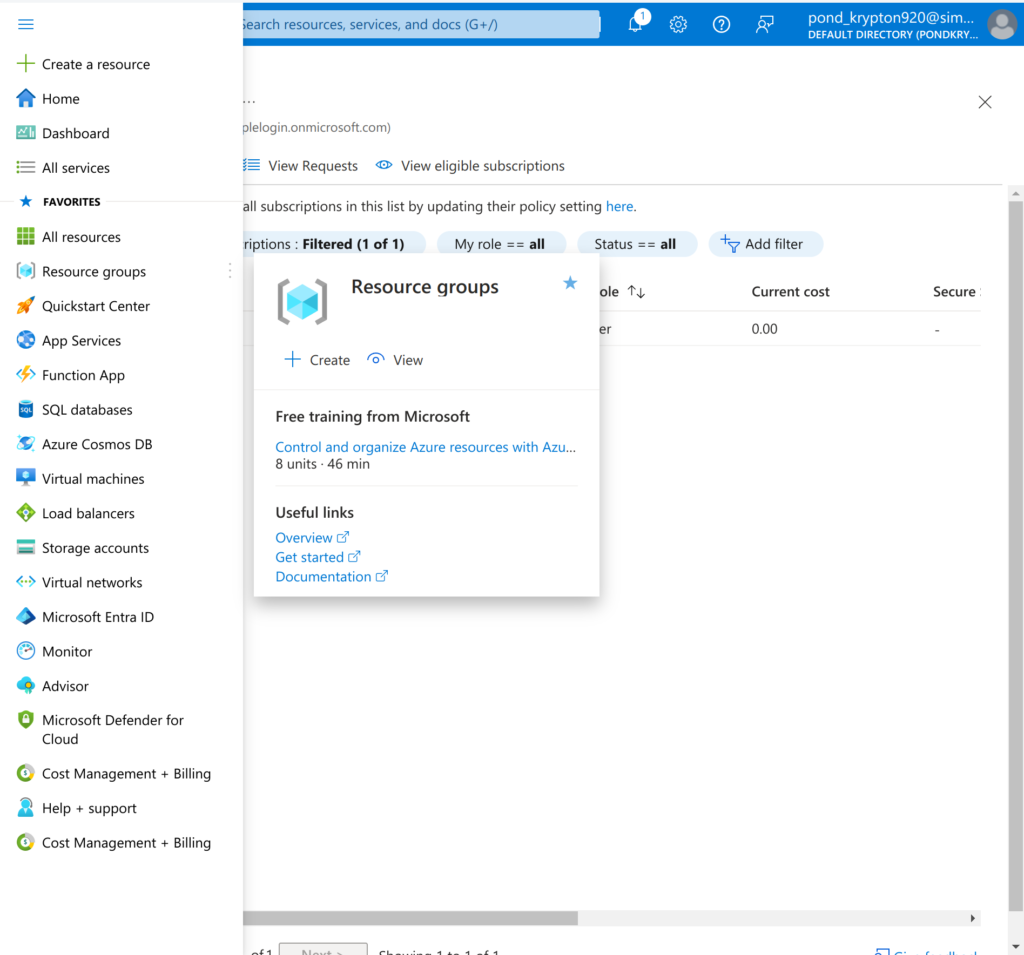
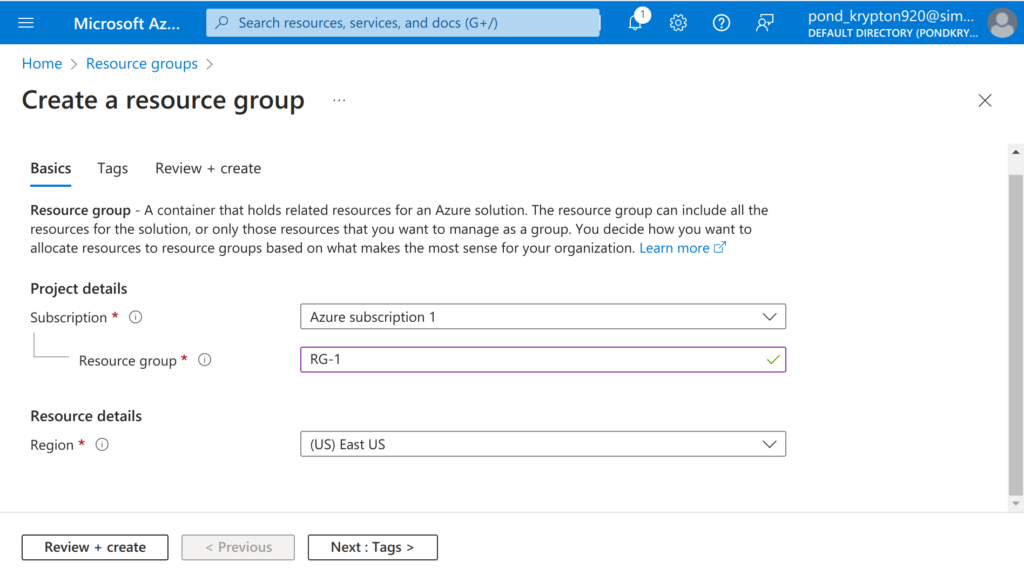
The next step after creating a tenant with a subscription is to create a resource group. As with anything we will do in the Azure portal, the option to create a resource group can be found by searching for it in the search bar, or by finding Resource Groups in the navigation menu. While hovering over it, it should bring up the option to Create. You can also just click Resource Groups and find the create option in the toolbar of the Resource Groups page.

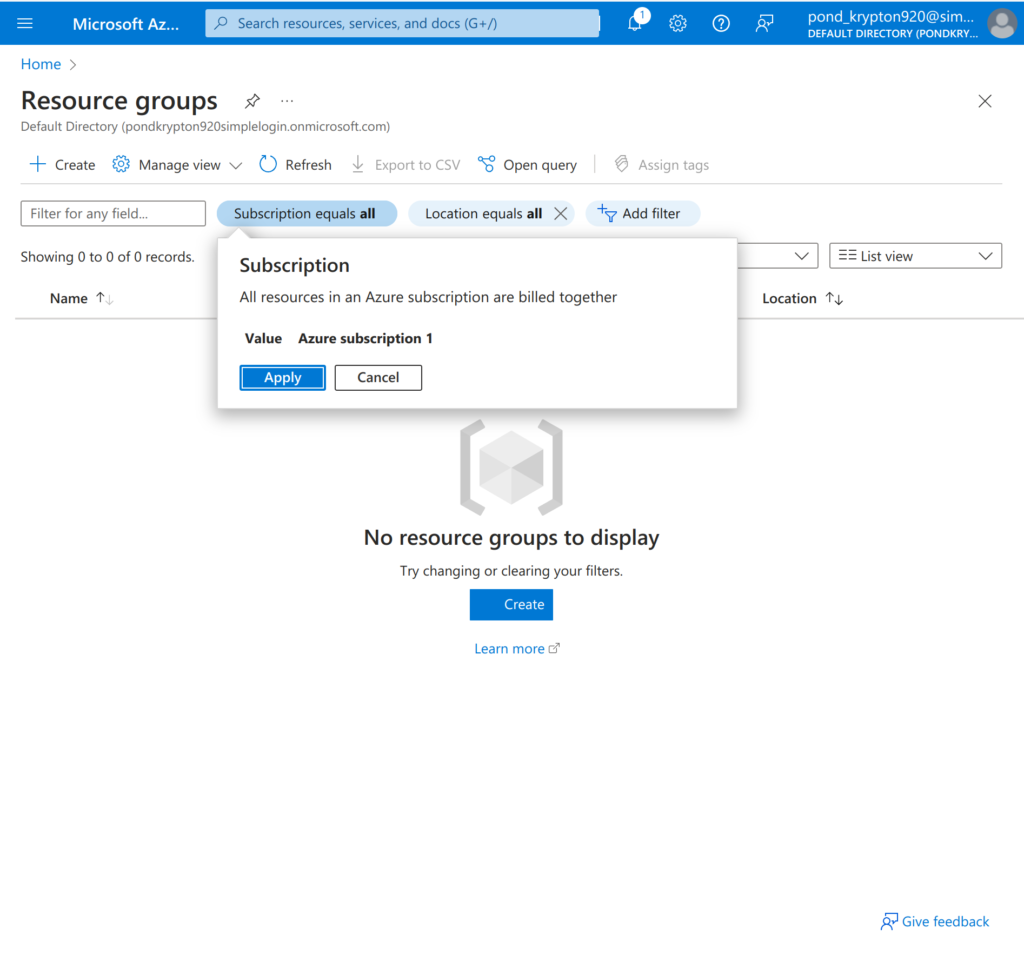
Seeing as we only have one subscription for this tenant, we won’t need to worry about which subscription is selected, but take note of the option to view resource groups of another subscription, located in the toolbar.
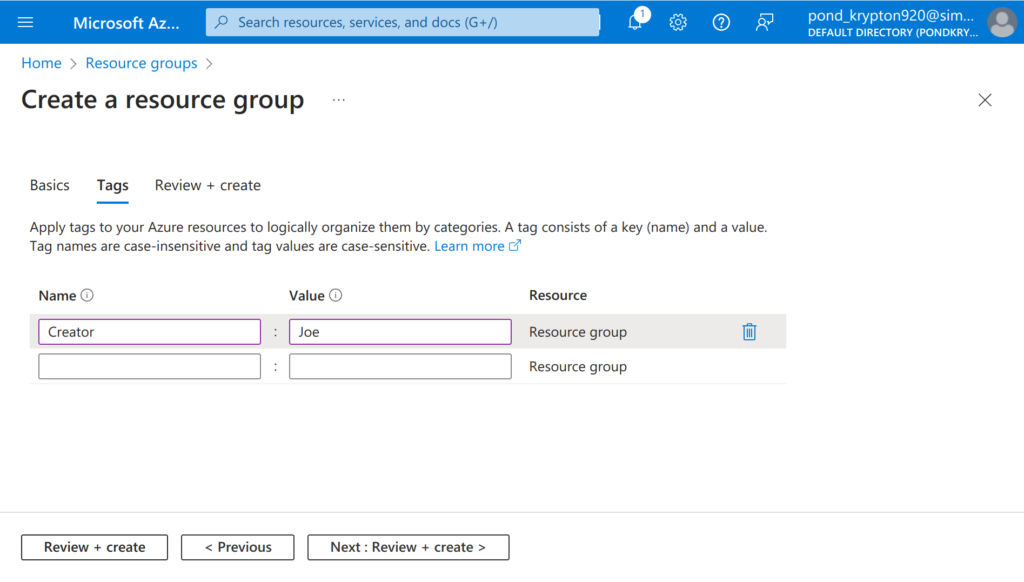
You can create a resource group by selecting the subscription, naming the resource group, and selecting the region you want it to be in. Before creating it, you may want to add tags to the resource group. These are useful to keep track of metadata about the resource group when working in a large organization. It could be something like “Creator : Joe”. After that, review and create.
Creating an Azure Storage Account
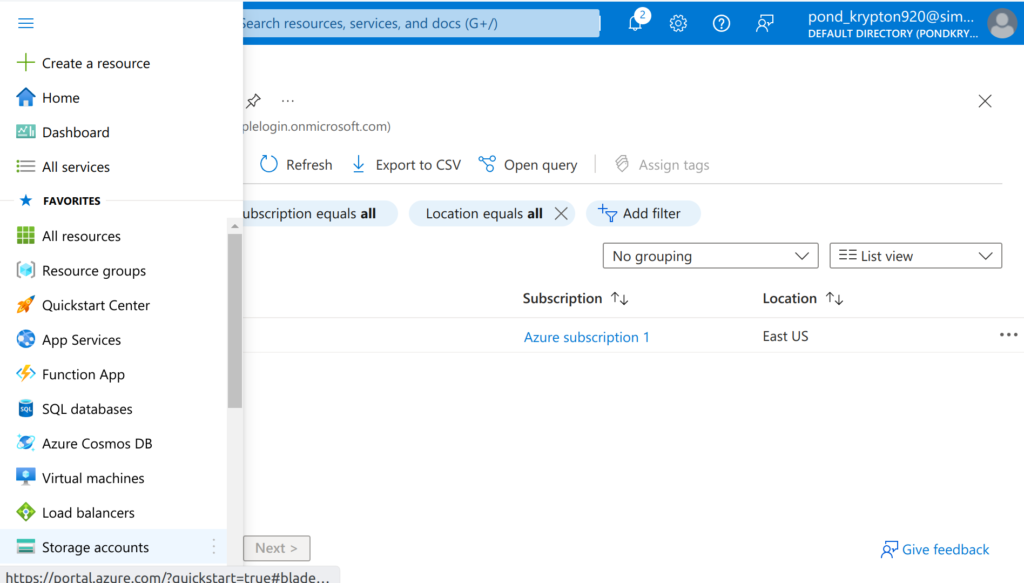
An Azure Storage Account is pretty much what it sounds like. It is a cloud storage solution with a variety of features. To create a storage account, find it in the search bar or the navigation menu.
The process of creating a Storage Account is just like the creation of a resource group. Select the subscription and the resource group we just made. You could also create a new resource group from this page. There is a major difference between naming the resource group and naming this storage account instance, which is that this instance name has to be globally unique.
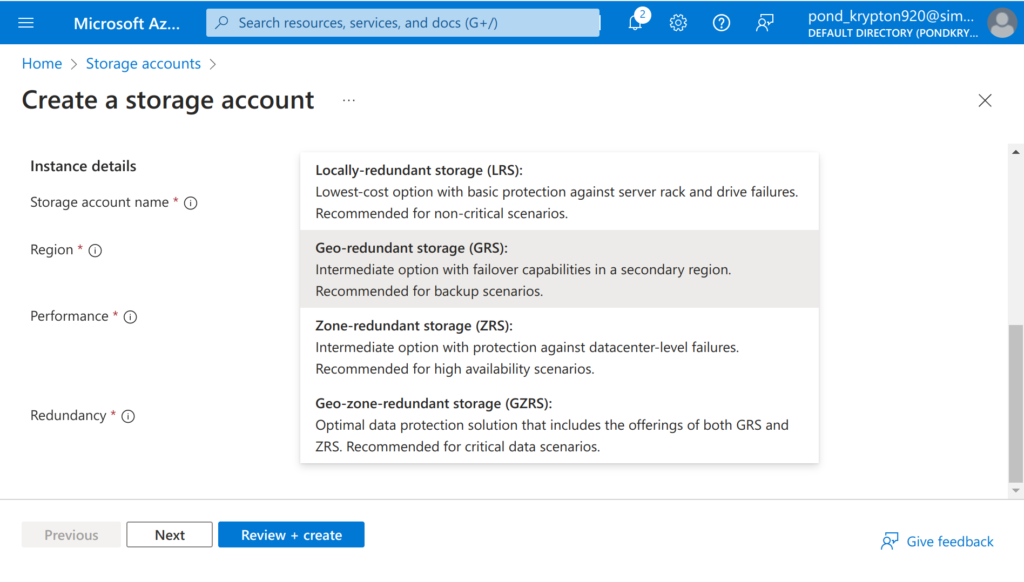
One setting that you should familiarize yourself with during the storage account setup is Redundancy options. These options change where your backups are stored. There are different reasons to choose each, which is well explained in the selection menu. I’m just going to use GRS.
Now that the Basics tab is done, I want to draw your attention to the Networking tab. One very important security relevant configuration that you should change is the Network Access setting. If this was a resource which would only ever need to be accessed from specific networks and IP addresses, then you should not leave it set to Enable public access from all networks. For the purposes of an educational project it may not be important; however, it would be very important in real world uses. For now, let’s just leave it as it’s default setting. I just wanted to point that out, but we won’t mess with it in this introductory project.
When you finish reviewing it, and click create then it should show you that the process of deploying it has started. You will then see your Overview page of the deployment.
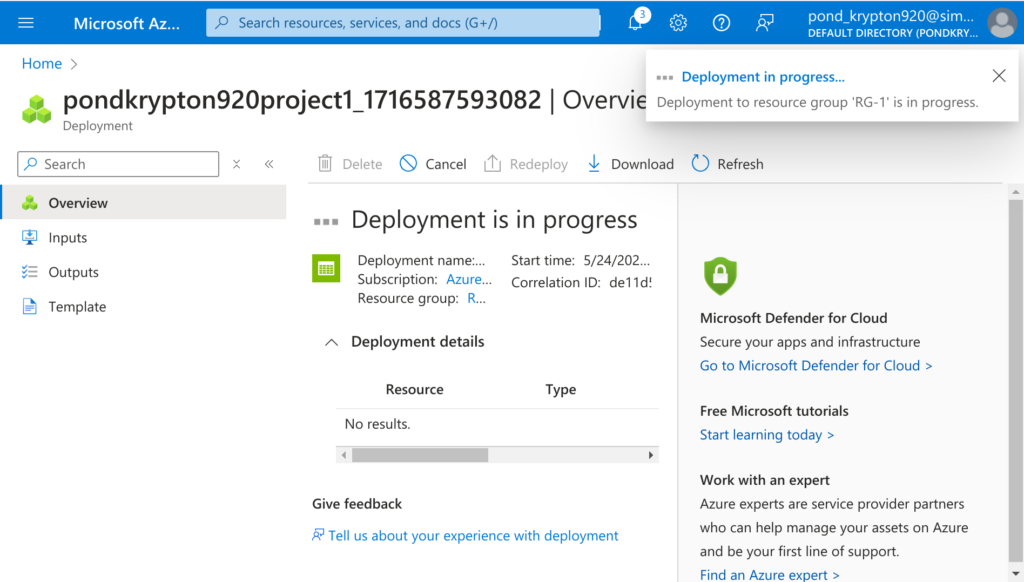
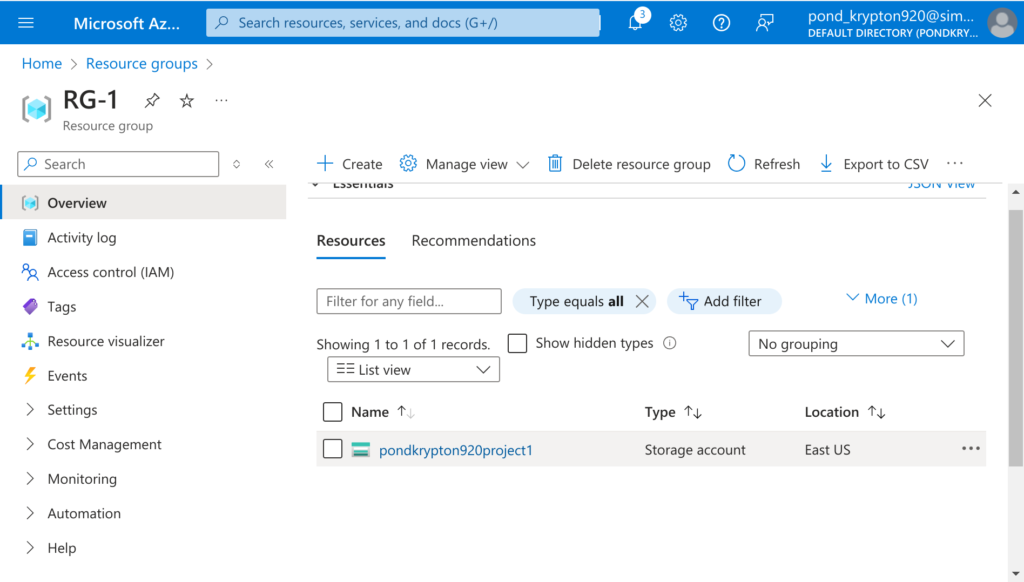
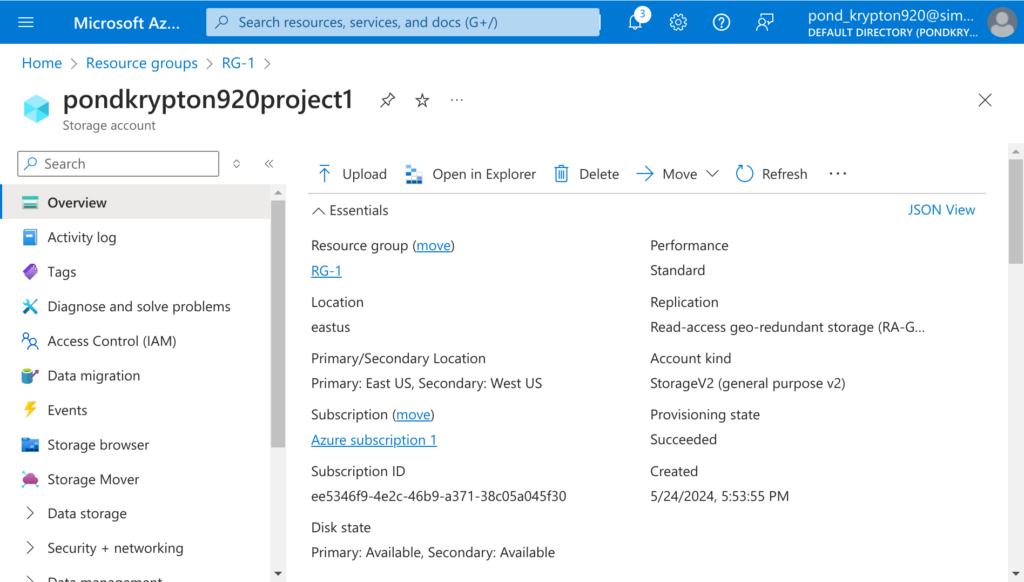
If you navigate back to Resource Groups and click on the resource group, then you should see the storage account inside of the group. Click on the resource to see it’s overview page. Scroll down in the navigation menu and expand the options under Data storage to find Containers. You can then click +Container to add a container.
Cost Management
In regards to billing, it’s very important to understand that you are billed based on the GB’s of data used by certain resources. For this reason, it is important to build a habit of cleaning out anything you are no longer using. At the scale of a business, resources can be quite large and rack up thousands of dollars in a month for things that don’t even need to be in there anymore. Keep that in mind as you complete projects in Azure.
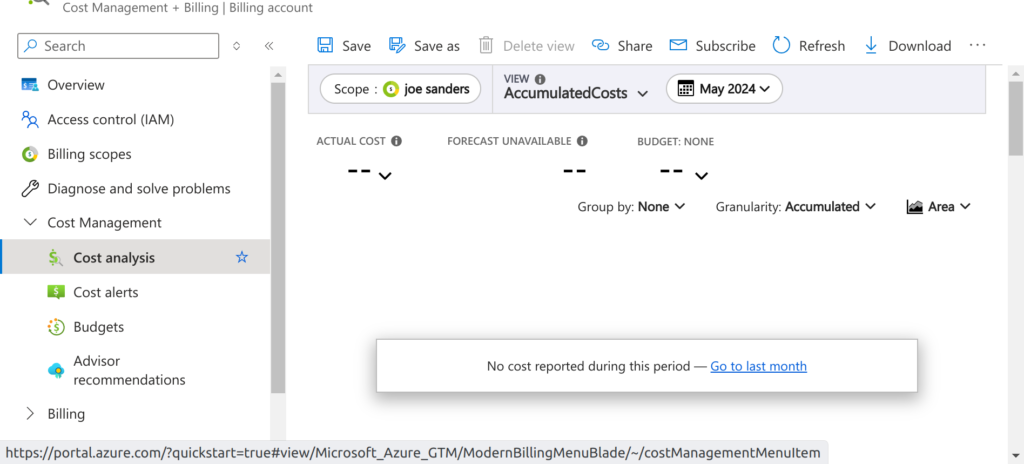
Cost Management is a tool in Azure which allows you to view the details of your billing. To find it, just search for Cost Management in the search bar. You can also find it towards the bottom of the home page navigation menu.
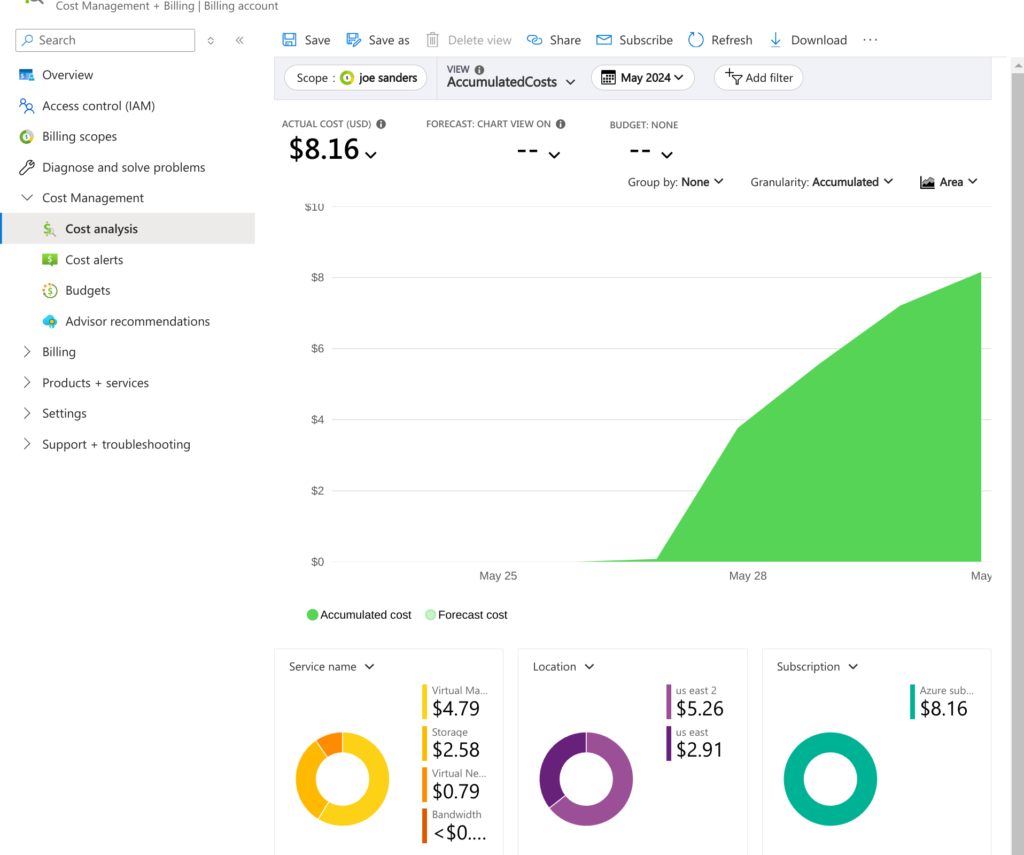
The Cost analysis section will show a breakdown of costs by service, location, and subscription. We have done so little in here so far that there won’t be anything for it to show yet, but you should periodically check in here to see what costs you are accruing.
The first screenshot is from shortly after beginning this project. As you can see, there hasn’t been any costs accrued yet. The second screenshot is several days later, after I had done quite a bit more in Azure. The cost was mitigated to a large extent by using hibernation diligently when the VM was not in use.
Creating Virtual Machines and Networks in Azure
If you have ever done any projects inside of a type 2 hypervisor like Virtual Box or VMware, then you won’t have too much trouble understanding the basic structure of a virtual network; however, there are some other aspects that are different about setting up virtual machines and virtual networks in Azure.
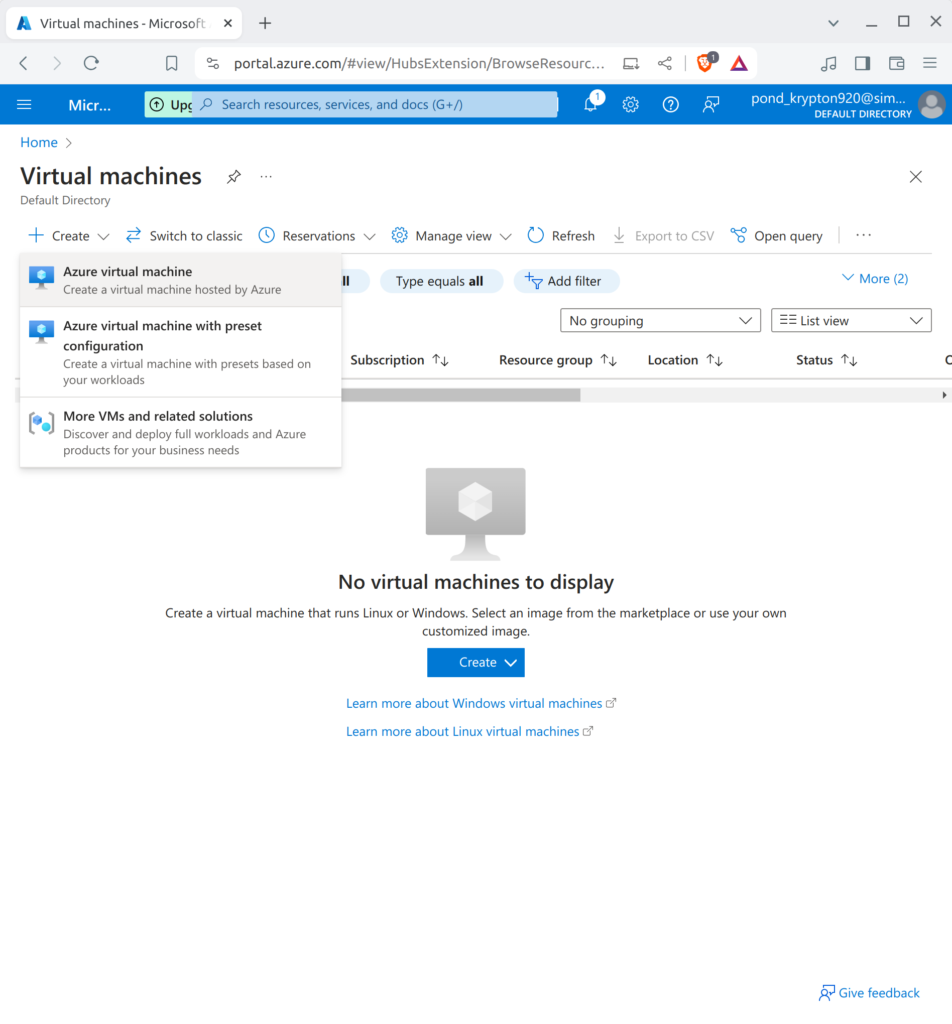
Search Virtual Machines in the top search bar, then click the option listed under Services, and click Create. Select the first option to create a Virtual machine without using preset configurations. Select a resource group, name the VM, and select the OS you want to use under the Image section. This first VM is going to be a Windows 10 Pro VM.
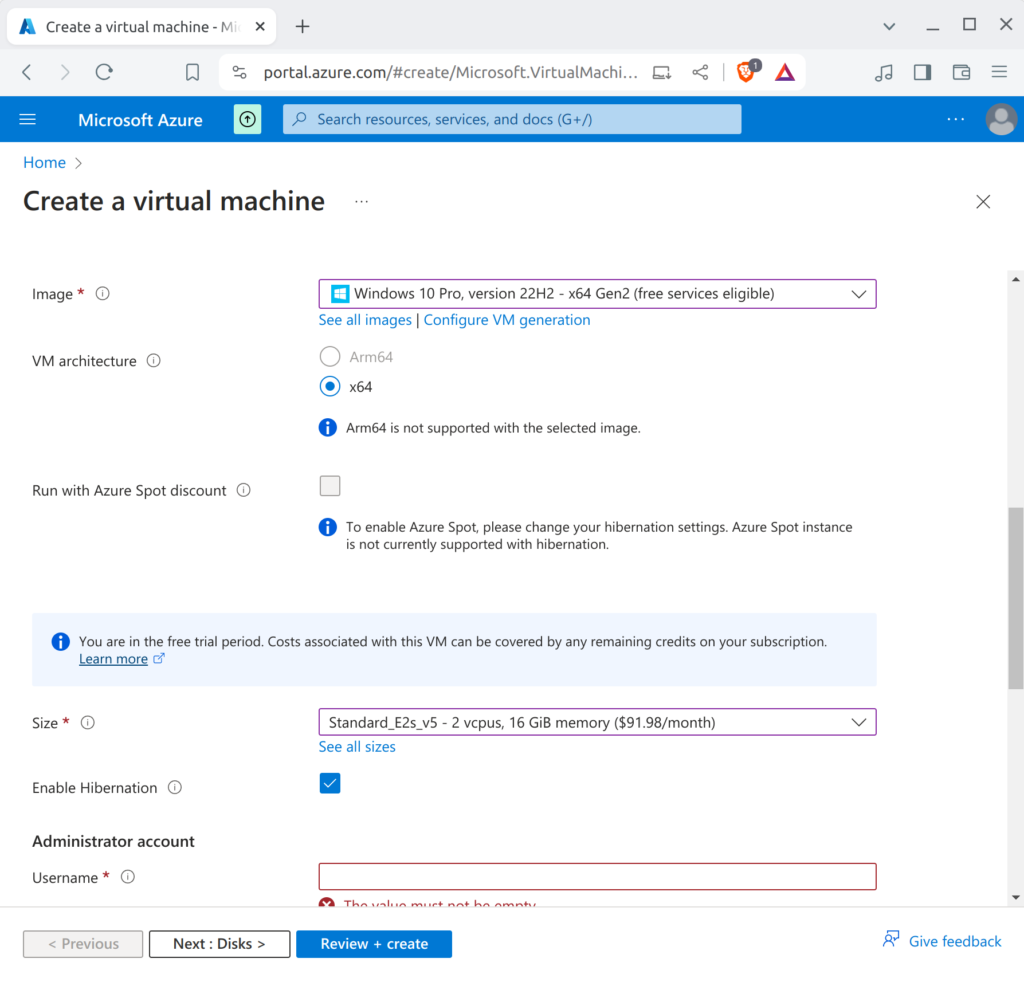
Next, go to the Size section. If all the options in the drop-down menu are greyed-out, then click See all sizes. They are greyed-out because this is a free trial. The size refers to the virtual hardware that the machine will have. The number of virtual cores for it’s processor and the size of the RAM will cause the price to change significantly. The free trial only has $200 worth of credit, so it’s important not to give the VM more than it needs.
Another thing to consider when selecting sizes is whether or not it is compatible with the Hibernation feature. Hibernation is different from just shutting down a VM because it saves the data on the RAM to it’s disk. This makes it a bit more user friendly while still saving on costs. The cost is not like a monthly subscription where you pay for a whole month, even when you don’t use it, but instead is more like paying for electricity. The monthly cost shown is an estimate. You will not come close to that estimate if you have the VM in hibernation for most of the day. With this in mind. You should be fine if you use a size that has a monthly cost estimate of $90. After a few days of using the VM and putting it into hibernation, I only racked up about $8 worth of usage.
After selecting the size, create an Administrator account username and password, and check the box under Licensing. Now you can move on by clicking Next : Disks >. You can just leave the defaults for the Disks section and click next again to get to Networking.
The defaults for the Networking settings should work fine, but It’s important to understand how it works. The subnet that it will create is the private IP address range that our internal private network will use. The private IP addresses of our VM’s will be what they use to communicate to each other within the network. When we create another VM, we will use this same subnet for it as well. In addition to the subnet, a public IP address will also be assigned to the VM so that we can access it from outside the internal virtual network. This is how you would use RDP or any other type of remote desktop connection over the internet.
When you are done, you can click Review and Create to see if the VM can be validated. In my case, it was not able to validate at first. When a validation fails, it will tell you which tab you need to visit to see which settings you need to reconfigure. It told me that the Basics tab needed to have something changed in it. Upon revisiting the Basics tab, it indicated that the region I had selected was not compatible with the subscription type. It appears that the free trial subscription did not allow me to use US East. When I changed the region to US East 2, it was able to validate.
What is particularly interesting to me is that when I went back to recreate the failed validation so I could take a screenshot, it actually let me use US East. I am not sure why it did not let me use US East the first time, but after validating with US East 2, then changing it back to US East, it said it was valid. As far as I can tell, all the settings are the same and only the region was changed. I though that would be useful to point out. I was not able to recreate this situation when creating the 2nd VM.
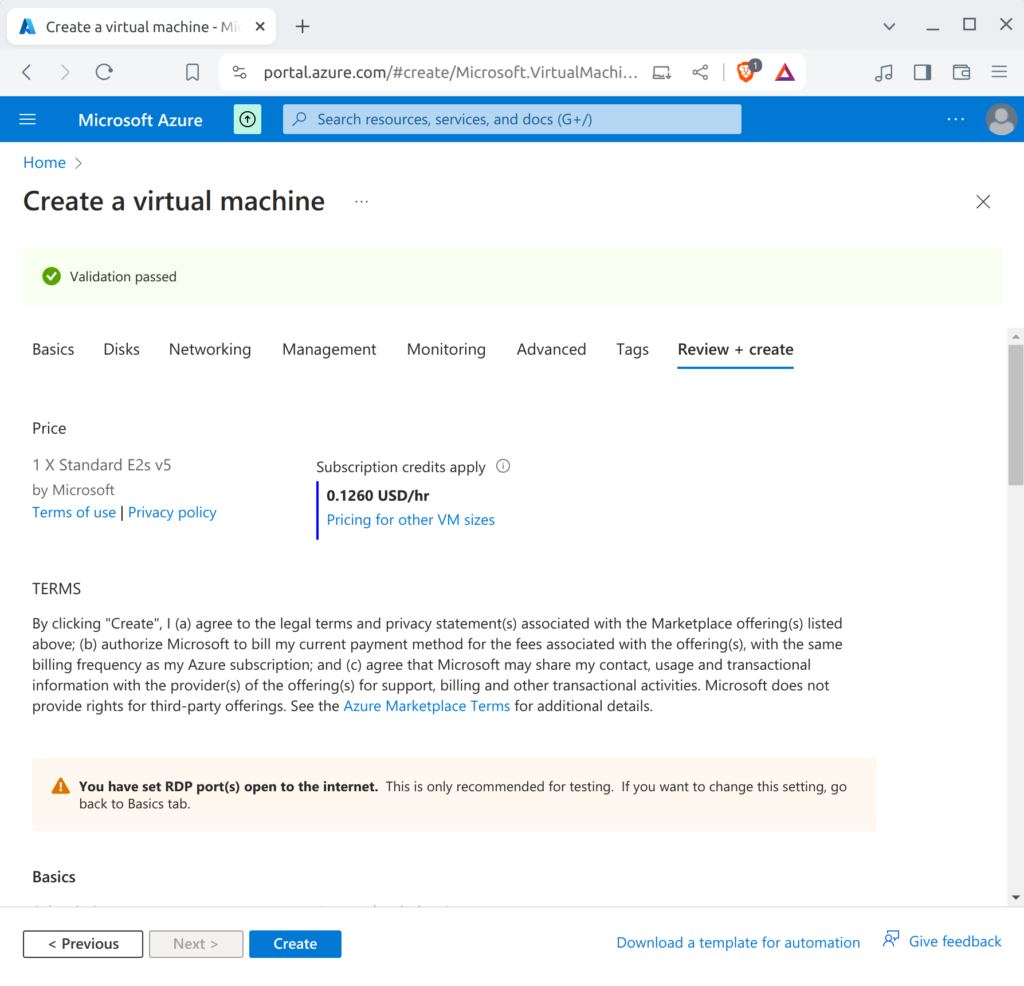
You can also see the cost per hour of this VM. The estimated $90 per month cost equates to a bit less than 13 cents per hour. That’s why I mentioned that you shouldn’t worry about the monthly estimate being so high as long as you don’t leave the VM running when not in use.
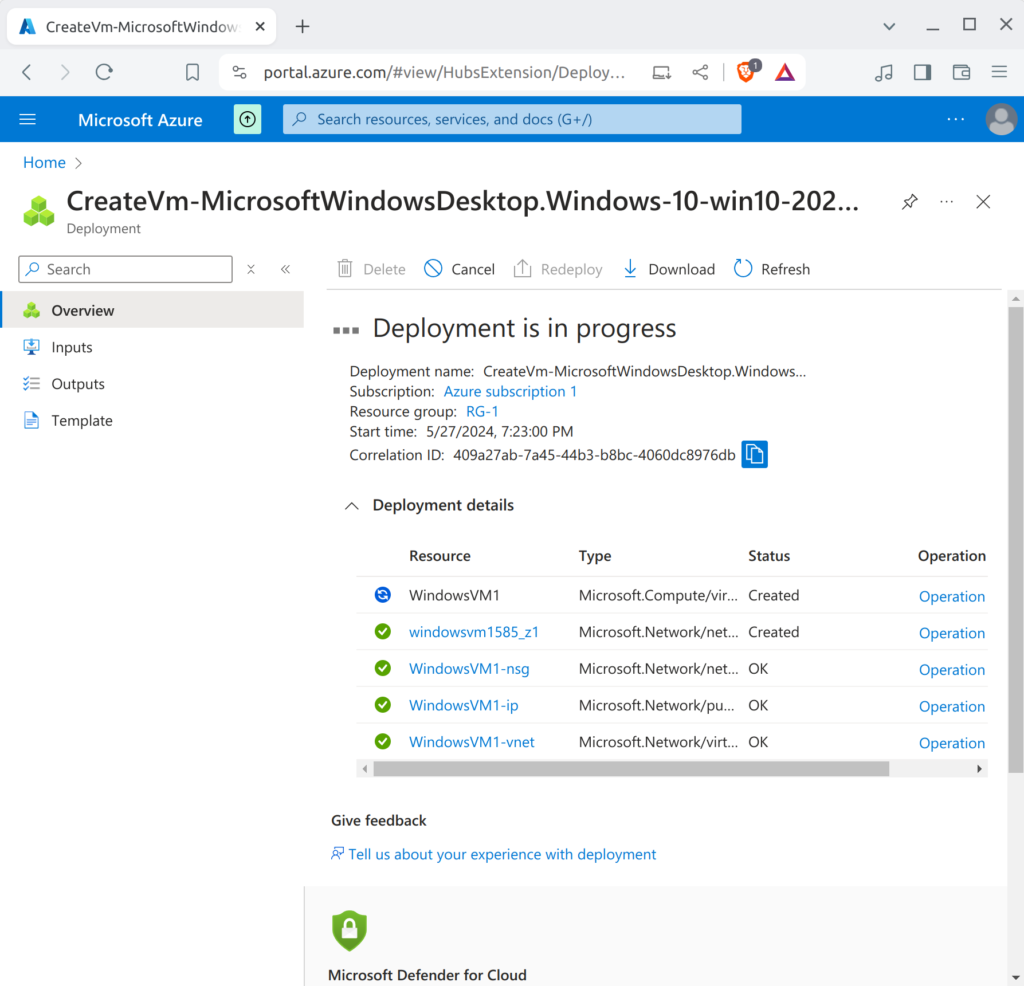
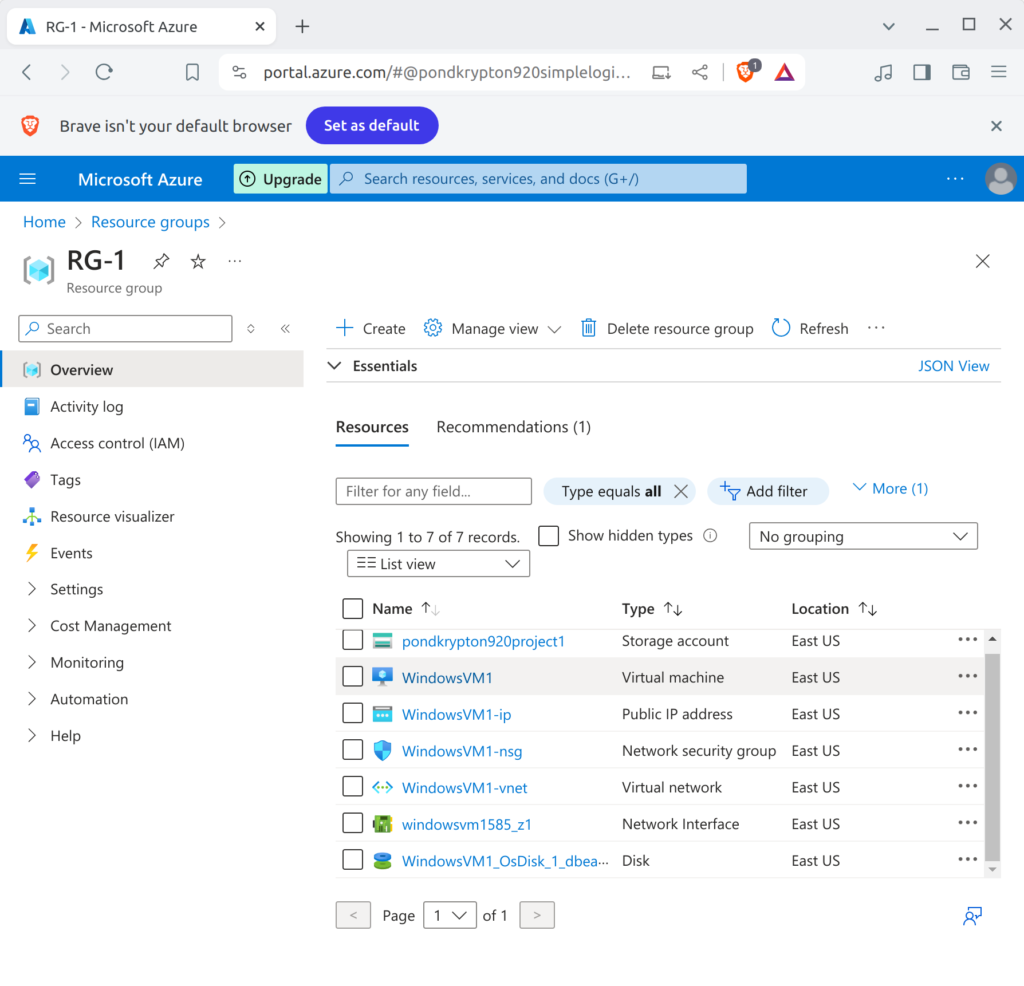
After everything is properly configured, we can pass the validation and create the VM. When the deployment is in progress, you can see all the resources it is creating. This includes the VM itself, but also a virtual NIC, NSG (Network Security Group), IP, and virtual network. Once the VM is created, you can see it and the other resources created alongside it in Resource Groups.
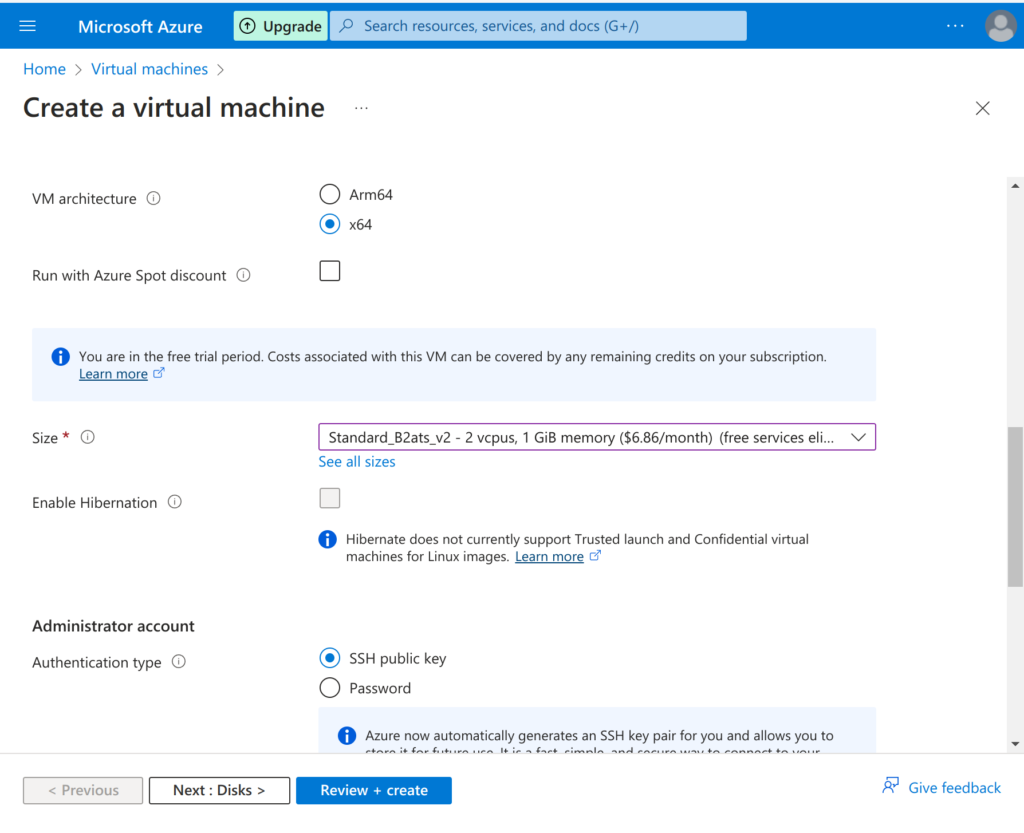
Now that we have a VM and a network, we can make the 2nd VM and put it on the same network. The 2nd VM will be a Linux machine. To do this, start the same process again to create a new virtual machine. Set the resource group as the same resource group used for the first VM. Make sure to configure it to be in the same region as the previous VM. It should have the default image as Ubuntu Server, so leave that default. As for the size, a Linux server image requires far less RAM than a Windows 10 Pro image (in terms of minimum OS RAM requirements). The default size may have a compatibility issue with availability zone 1, but I found that using the similar size that says “(free services eligible)” in it’s name will work with availability zone 1. In the Administrator account section, set the authentication type to Password so we can SSH into it a bit easier.
In the Networking section, make sure that the Virtual Network field has the network we made when creating the first VM. It will most likely already have it by default because we are creating the VM in the same resource group, and there are no other networks yet. Also confirm that the Subnet is the same as the first VM. After this we can Review + Create. Once again I had an issue using US East, and was prompted to change the region in order to pass validation. US East 2 worked for me.
After this process is complete, you can delete everything and run through it all again. One problem I faced when deleting a resource group is that it took a bit longer than I expected to delete is. The same is true for individual resources inside a resource group. Their names linger around for a few minutes, which can make you think that something didn’t work. For me, everything got really buggy when I tried to instantly recreate everything after deleting everything. I’m not sure about the specifics, but it seems like it just needs a few minutes before you can recreate a resource with the same name as one you just deleted.
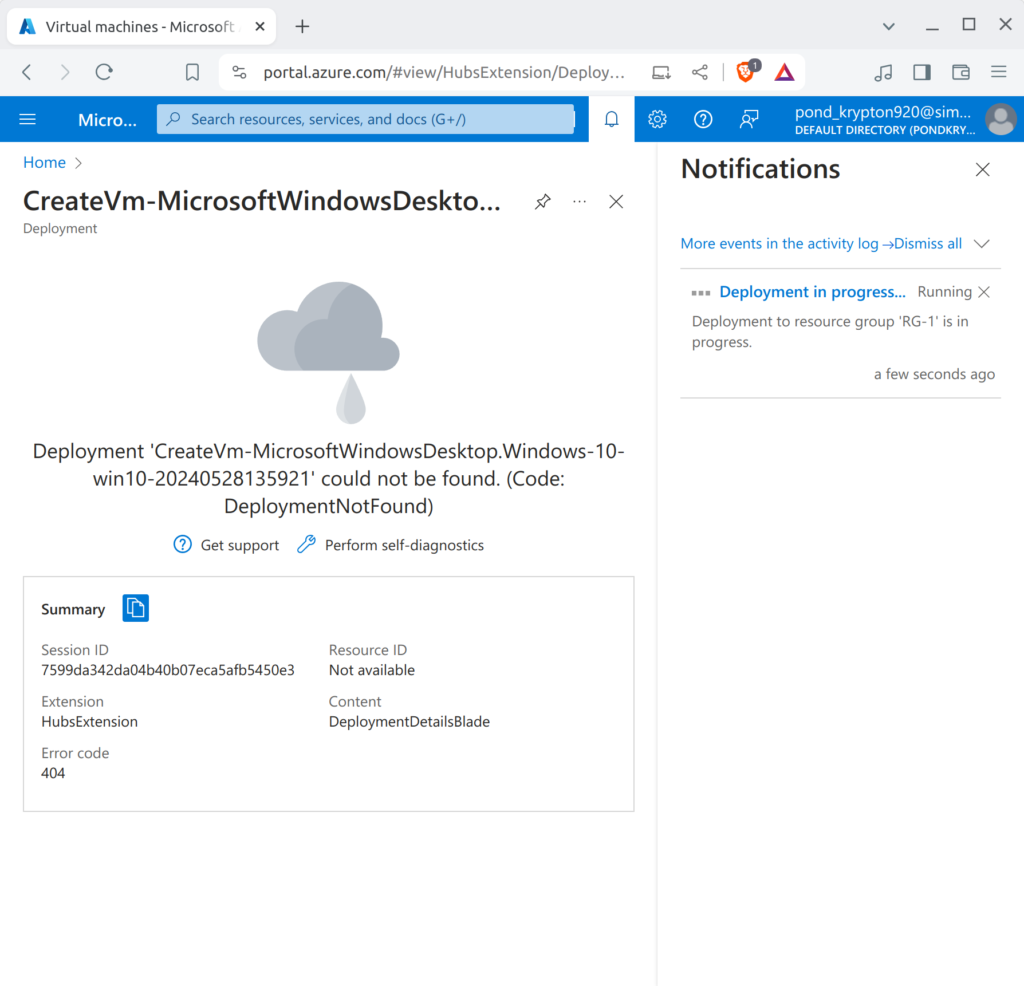
Another issue I encountered when repeating the VM creation process is that the virtual network I made with the first VM did not show up when making the 2nd VM. This is likely because I started making the 2nd VM so quickly after making the first VM. There seems to be a lag time in which the resources are visible and indicate that they exist, but will not show up when creating the 2nd VM.
Remotely Accessing Azure Virtual Machines with RDP
Each of our VM’s have a public IP address which we will need to know in order to remotely access them over the internet. To see a VM’s public IPv4 address, find the VM listed inside it’s resource group, or search for “Virtual Machines” and click on the VM you want to access. In this case we want to use RDP to connect to the Windows 10 Pro VM.
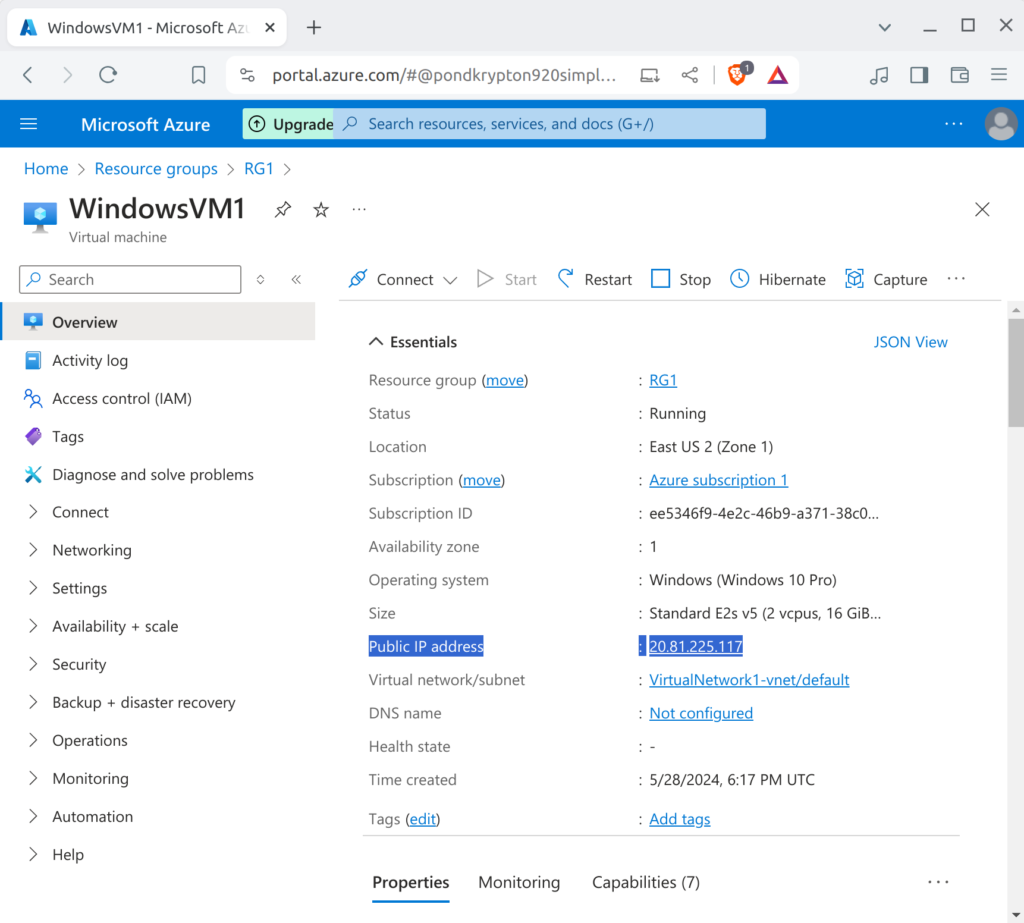
To connect to the Azure Windows VM, I am going to start up a Windows 11 Enterprise VM in my local hypervisor. This is only because I use Linux on my devices but I want to replicate the process of doing it on a Windows computer. This isn’t necessary if you use Windows or MacOS. On MacOS you can get Microsoft Remote Desktop in the App Store.
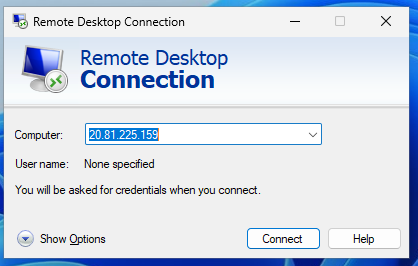
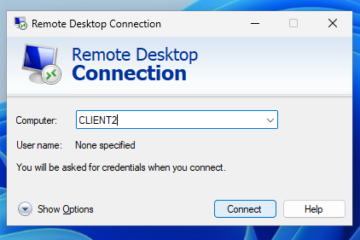
Search for Remote Desktop Connection in the Windows search bar. Enter the Azure Windows VM’s public IP address in the Computer: field. After you click Connect, you will be prompted for credentials to connect to the VM. These are the credentials you entered when creating the VM. In my case, I need to click More Choices because I previously used this account to connect to a VM in my local Active Directory domain. This means it is prompting me to enter the credentials used to authorize connections on the local domain, but that isn’t what I need to enter to connect to the Azure VM. By clicking Use a different account, I can have the option to enter the Azure Windows VM’s Administrator credentials. If you are using Windows 10 as the computer you are connecting from, then it will look a bit different.
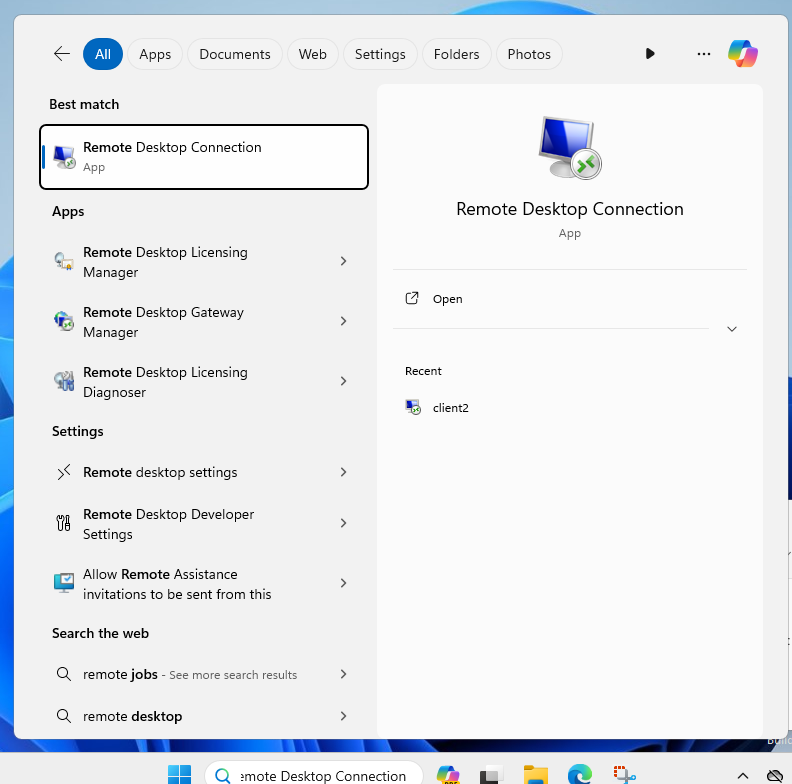
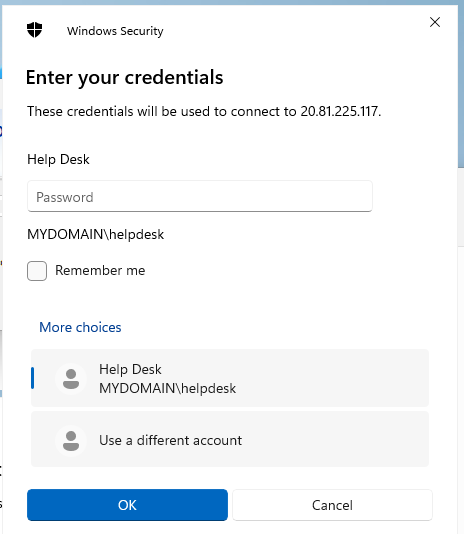
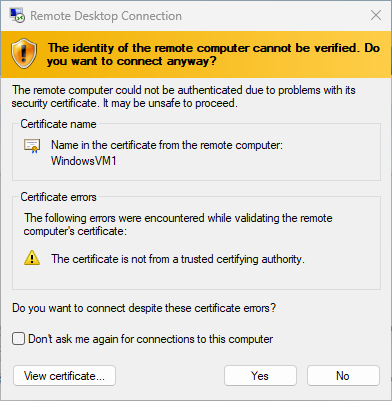
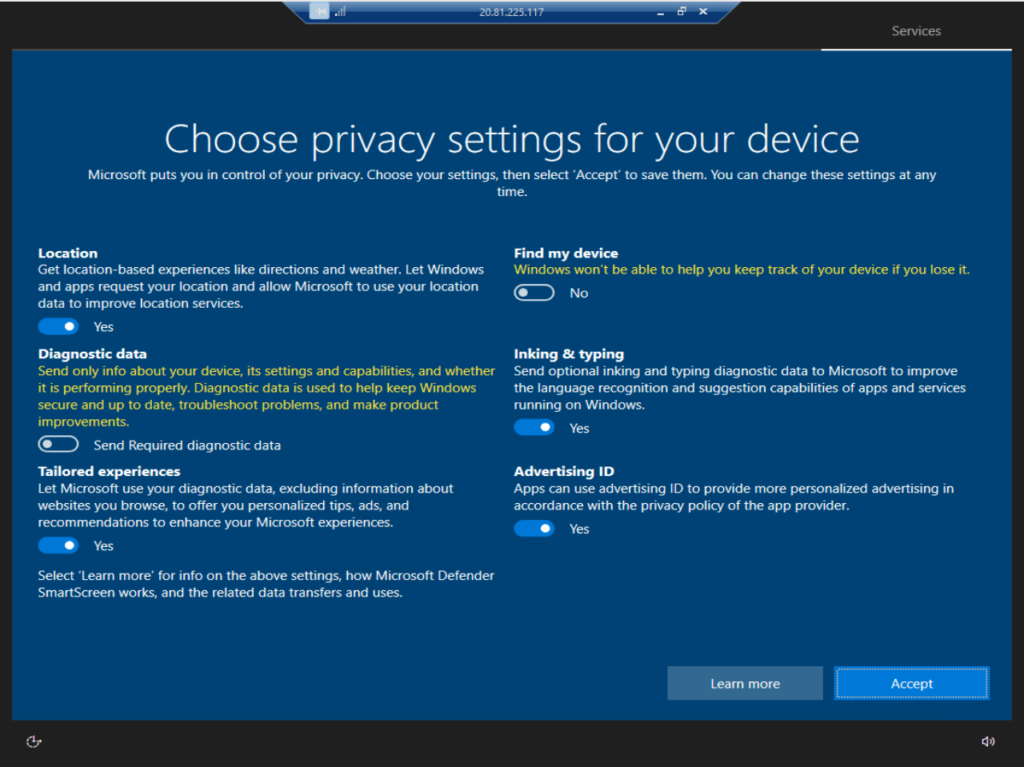
You will likely get a warning about the computer you are connecting to not having a proper certificate. In this situation, just proceed anyway. You should then see it connecting to the VM and displaying the username of the VM on the lock-screen as it unlocks. From there, you can start setting up the OS configurations. If you need to access something on your computer outside of the remote desktop connection, then click the minimize button in the top toolbar.
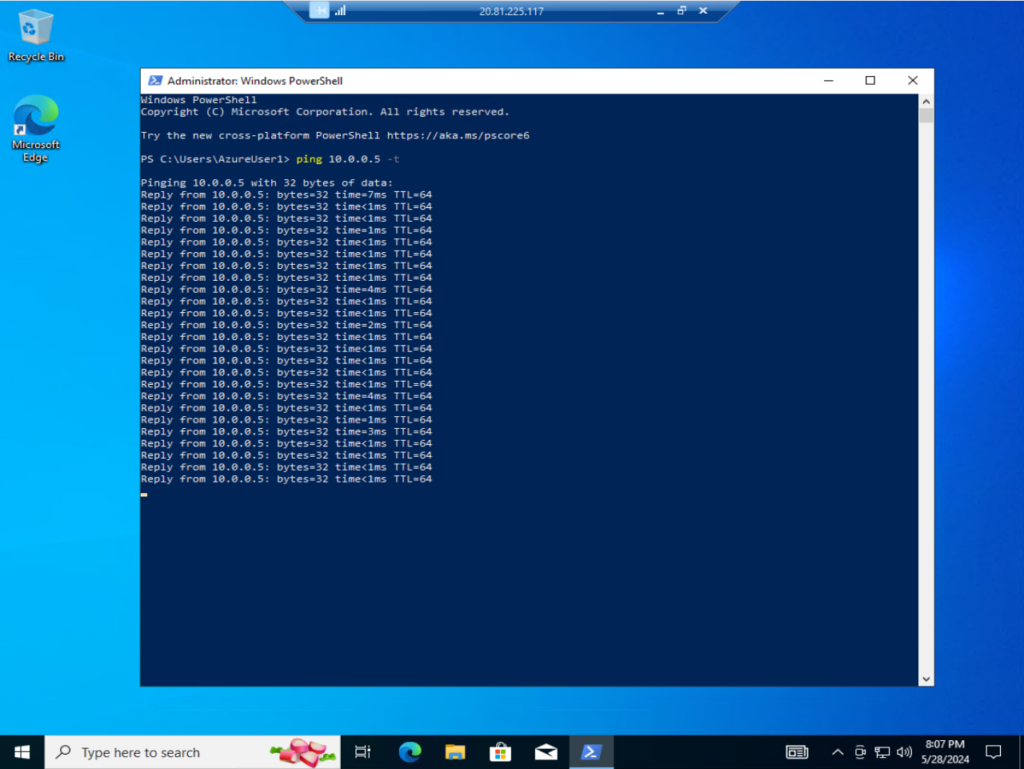
In the next section, we will change firewall settings to stop ICMP traffic from going to the Linux Server VM. Technically they are called Network Security Group settings, and are not called firewall setting in Azure. To test if it is working or not, we need to ping the Linux Server from the Windows 10 Pro VM. To do this, find the Linux Server’s private IP address. We can use the private IP address because they are both on the same network. The private IP address can be found in the same place you found the public IP address. Navigate to the 2nd VM in the Resource Group or by searching “
Virtual Machines”.
Take the private IP address and use it in a ping command to confirm connection.
ping 10.0.0.5
If the ping is successful, then you can add the -t option to it. This will make it continuously ping.
ping 10.0.0.5 -t
Changing Firewall Settings in Azure (Network Security Groups)
While we have a continuous ping being sent to the Linux server VM, we can go into the Azure portal to change it’s Network Security Group (NSG) settings and prevent incoming ICMP traffic. The Network Security Group basically is a firewall. It is where inbound and outbound traffic rules can be made, among other features.
Search for “Network Security Group” and select the one for the Linux server VM. Open up the Inbound Security Rules under settings. Click Add, set source to “any”, and the destination to “any”. This network security group only applies to the Linux server, so “any” really just means the Linux server. If we were to create another VM and use the NSG for it, then selecting “any” as the destination would make this rule apply to it as well.
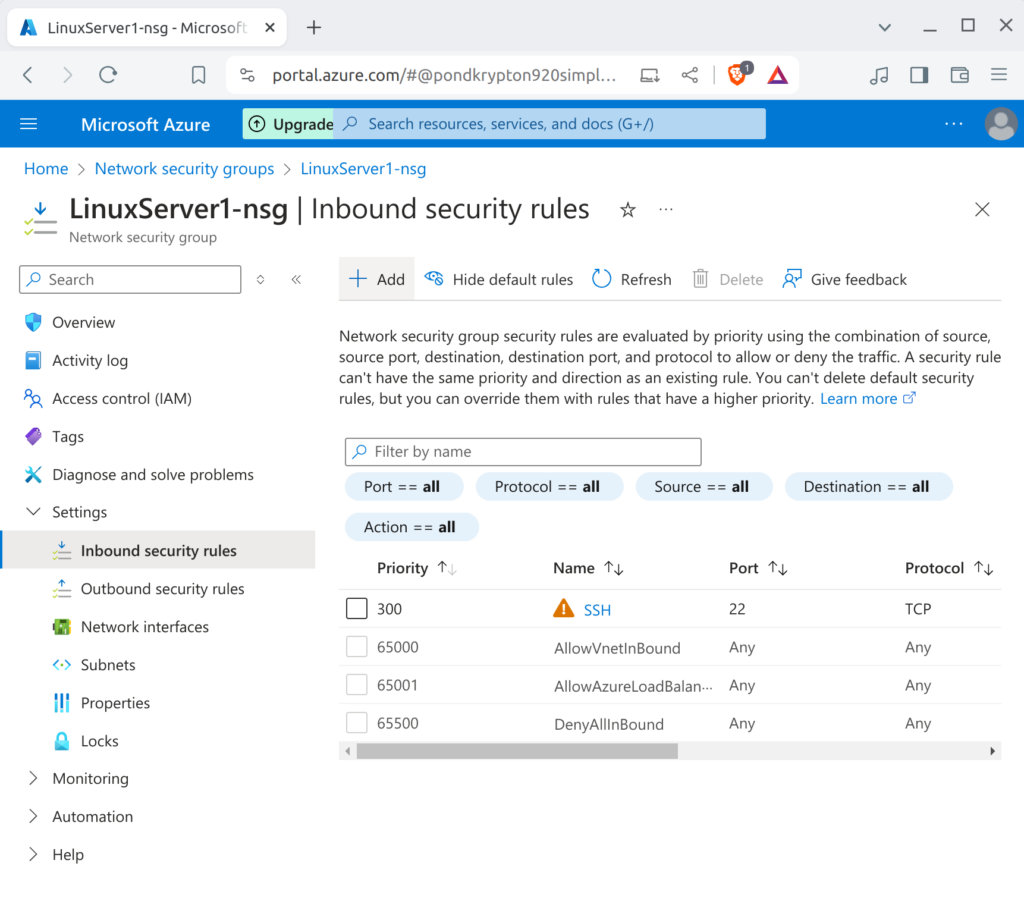
For destination port ranges, we will not enter anything. ICMP doesn’t use port numbers like TCP and UDP, so when we select ICMP as the protocol it will automatically enter an asterisk in the port ranges field. Select Deny as the action. Name the rule something like “DENY_ICMP”.
The priority number is used to tell the traffic which rule to listen to first. For example, if you had a rule with a lower priority number that contradicted a rule with a higher priority number, then the lower priority number would be the one that is actually followed. In this situation it doesn’t matter because we have no contradicting rules and will most likely not create any contradicting rules later.
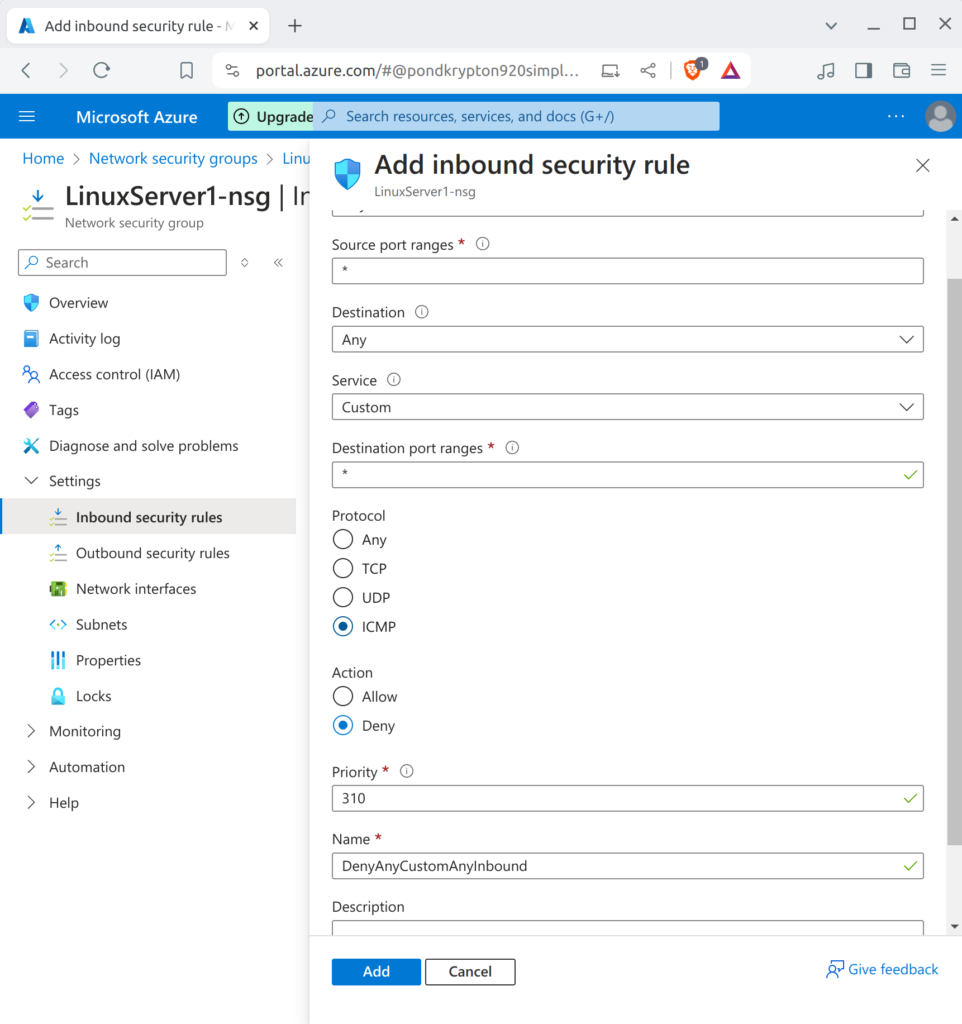
As soon as the new rule is in effect, we should be able to see the impact of it by looking at the PowerShell terminal. The continuous ping should now be having repeated “Request timed out” indications.
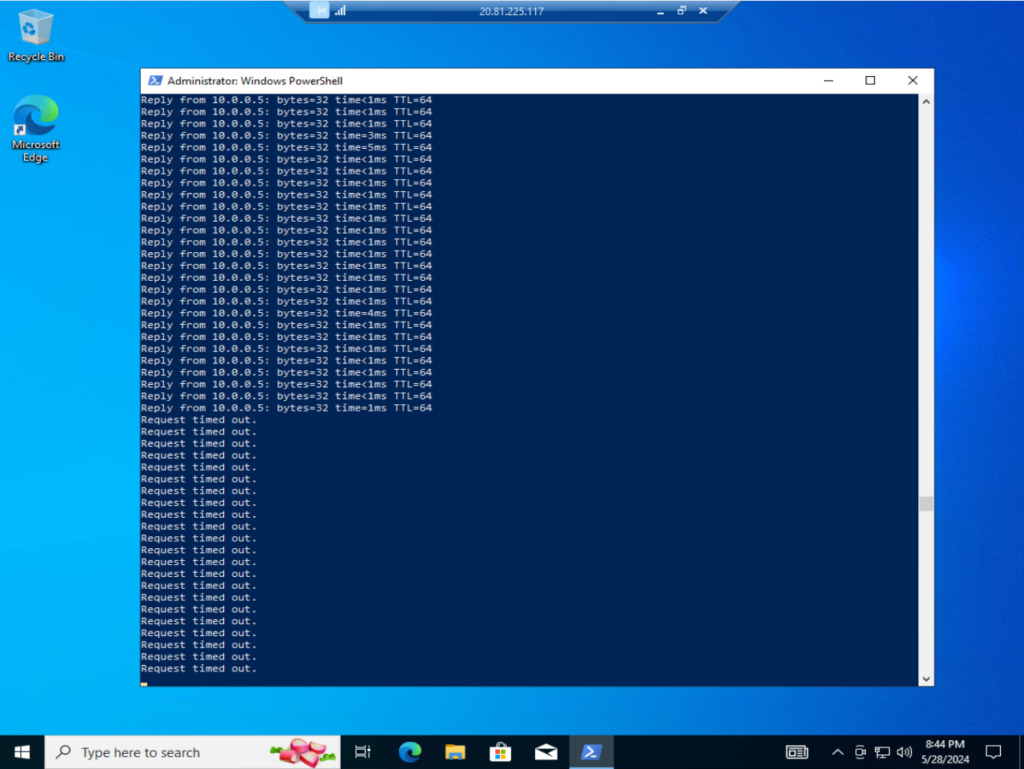
To allow ICMP again without deleting the rule entirely, click on the rule to edit it and change “Deny” to “Allow”. It will take a minute to take effect, but once it does the ping requests should start getting a response again.
I have covered a bit about using SSH in other posts, but I will cover it again briefly here so you can access the Linux server VM through the Windows 10 Pro VM. All you have to do in order to SSH into a server is type the SSH command followed by the username of the server @ it’s IP address.
Type “yes” to continue, then enter the password when prompted. The password will not show as you type, nor will it show asterisks for each character you type. It will just stay blank.
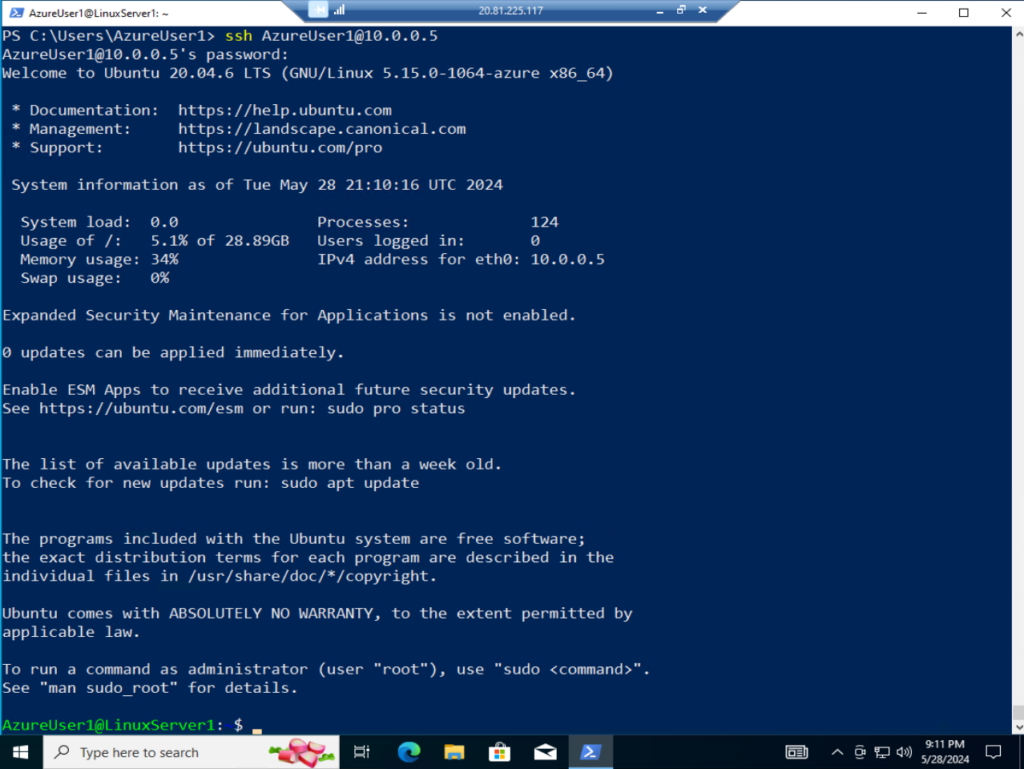
When you are done and you want to stop a VM, you can do that from the Resource Group by right-clicking on the VM and selecting Stop. Later, when we are doing projects inside the VM and you want it’s RAM to save to disk, you can use Hibernate. For hibernate to work you needed to select the correct size. It tells you when you select the size if it is compatible with hibernate. The Linux server VM can’t hibernate. It would be smart to just delete all the resources at this point because they are easy to set back up if you need to and they don’t have any data on them. It is a good way to preserve your free $200 subscription for as long as possible.
Conclusion
This concludes the introduction to Azure. To get further ongoing practice with it you could use it for all other projects to replace a hypervisor. The $200 will go quite a long way in terms of doing projects. More and more organizations are moving to cloud based environments and hybrid environments, so being familiar with Azure is very useful. My following posts will be projects completed using Azure, so this post will be the foundation for setting up those projects.
Thank you for reading!
0 Comments